
Why Caulking Fails Faster Than It Should
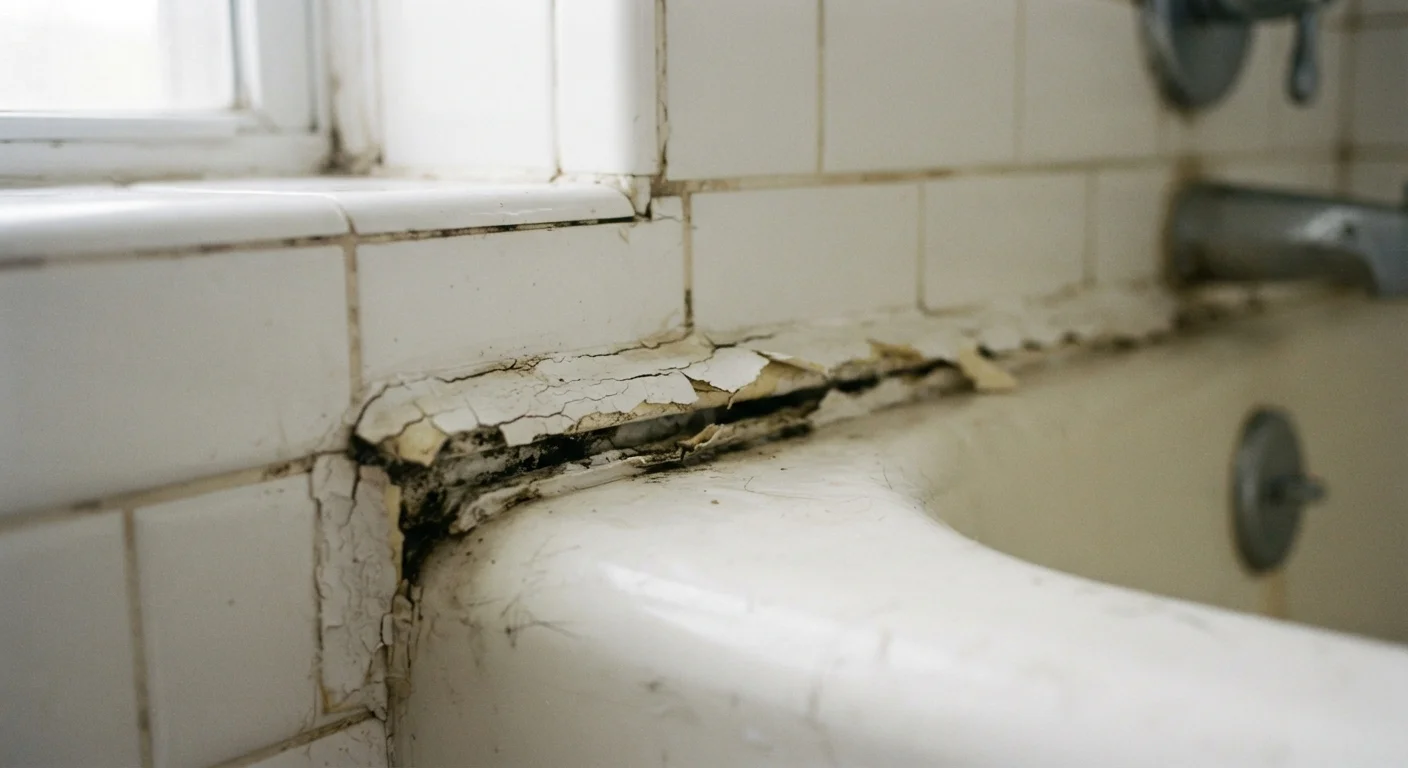
Photo credit: Infolagoon.com | Blogs To Rely On
Poor surface prep, wrong product choice, and application errors are the real culprits behind peeling caulk. Here's what to do differently.
Key Takeaways
- Surface prep is the single most important factor in how long caulk lasts.
- Using the wrong caulk type for the location is one of the most common and costly mistakes.
- Applying caulk over existing caulk creates a weak bond that fails quickly.
- Temperature and humidity at application time directly affect adhesion and cure quality.
- Recaulking on a regular schedule — not just when it fails — protects your home year-round.
Why Caulk Rarely Fails on Its Own
When caulk peels, cracks, or crumbles within a year or two of application, it's rarely a product defect. In most cases, the failure is traceable to something that happened — or didn't happen — before the caulk gun was ever picked up. Understanding why caulk fails is the first step toward making repairs that actually last.
Caulk serves as a flexible sealant bridging the gap between two surfaces that may move slightly with temperature changes, humidity, or normal settling. When applied correctly to the right surface with the right product, it can last many years. When any of those conditions are off, the clock starts ticking much faster. The good news: every one of the most common failure causes is preventable.
For a broader look at how deferred maintenance compounds over time, see why small repairs matter — the same principle applies to caulk.
Skipping surface preparation before applying caulk.
Why it happens: Homeowners often want to get the job done quickly and assume a visually clean surface is ready. In reality, soap film, mildew, dust, and old residue all break the bond.
Using the wrong type of caulk for the location.
Why it happens: Many homeowners grab whatever caulk is available without checking whether it's rated for wet areas, exterior exposure, or high-movement joints. A general-purpose acrylic caulk will not hold up in a shower.
Applying caulk over existing caulk without full removal.
Why it happens: Removing old caulk is tedious, so homeowners often apply a fresh bead on top hoping it will seal the gap. The new layer bonds to the degraded old caulk rather than to the substrate.
Leaving gaps or air pockets in the bead.
Why it happens: Inconsistent application speed or an improperly cut nozzle leads to a broken or uneven bead. Air pockets trap moisture and become entry points for mold and water damage.
Caulking over active moisture or mold without treatment.
Why it happens: When mold is present, it's tempting to simply seal over it to hide the problem. However, caulk traps the moisture and mold behind it, which accelerates failure and can worsen the underlying issue.
Setting Up for Success: What to Do Before You Caulk
Most of the work in a successful caulk job happens before the product is ever applied. Proper preparation takes more time than the application itself — and that's exactly how it should be.
Old Caulk Must Be Fully Removed First
Applying new caulk directly over old caulk is one of the most common reasons a fresh bead fails within weeks. The new layer bonds to the degraded surface of the old caulk rather than to the substrate itself, resulting in poor adhesion. Always remove all existing caulk — including residue — before starting fresh. A caulk remover tool or plastic scraper, followed by rubbing alcohol or a diluted vinegar wipe, makes this step much more effective.
Once the surface is clean, dry, and free of old material, choose your product carefully. If you're sealing around a bathtub, shower surround, or kitchen sink, a 100% silicone or siliconized caulk rated for wet environments is the appropriate choice. For window and door frames on the exterior, look for a caulk rated for outdoor use that specifies flexibility across temperature ranges. Interior trim and baseboards are generally fine with paintable acrylic latex. When in doubt, read the product label — the use cases are listed clearly.
Don't Caulk in Extreme Heat or Cold
Most caulks require application temperatures between 40°F and 90°F to cure properly. Applying caulk in freezing weather or during a summer heat wave can prevent proper adhesion and cause shrinkage, bubbling, or premature cracking. Check the product's temperature range on the label and plan your project accordingly — especially for exterior applications.
For guidance on where caulk fits alongside other sealing methods, caulk versus weatherstripping breaks down which solution belongs in which situation. And if you're approaching this as part of seasonal home preparation, weatherproofing your home before winter outlines where failing seals create the most vulnerability.
After application, allow the caulk to cure fully before exposing it to water or stress — curing times vary by product and humidity, so check the label. A properly applied, fully cured bead will be smooth, firmly bonded on both sides, and slightly flexible to the touch. That flexibility is what allows it to move with the surfaces rather than crack away from them.

Author
Home & Living Editorial Team
Home & Living Editorial Team is the collective byline for our editorial team and contributor network. Articles published under this byline or an editorial pen name are researched, written, and reviewed according to our editorial standards for clarity, consistency, and independence before publication.
View all articles →